Pixel Flow Level 1875 Solution | Pixel Flow 1875 Walkthrough
How to beat Pixel Flow Level 1875: Video solution & walkthrough. The fastest way to pass Pixel Flow 1875.
Is this the wrong level layout?🤔
Pixel Flow randomizes levels for different players. Don't worry, just upload a screenshot of your board, and our AI will find the correct video instantly.


Pixel Flow Level 1875 Solution
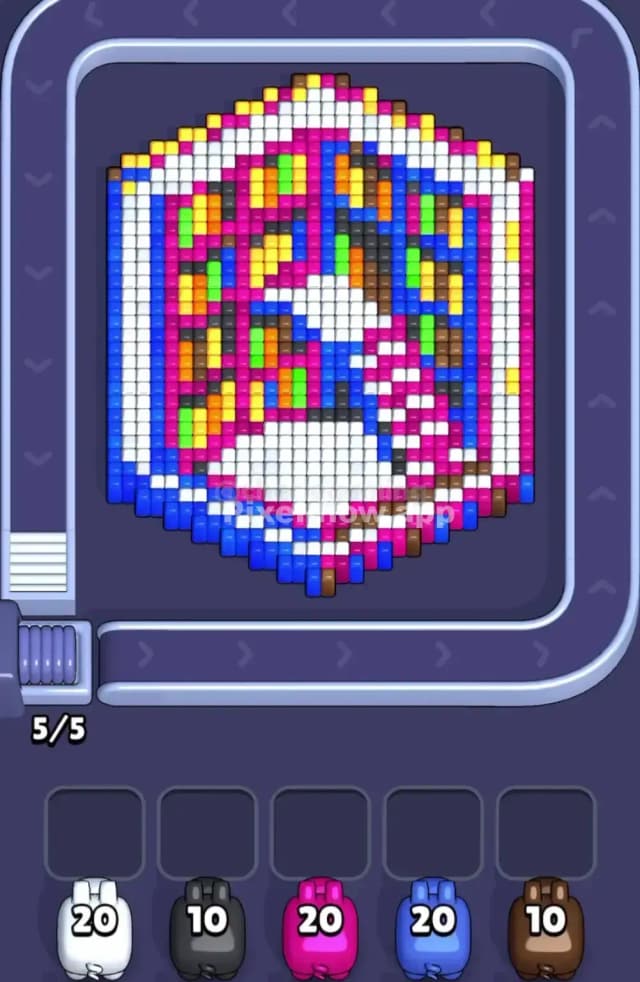
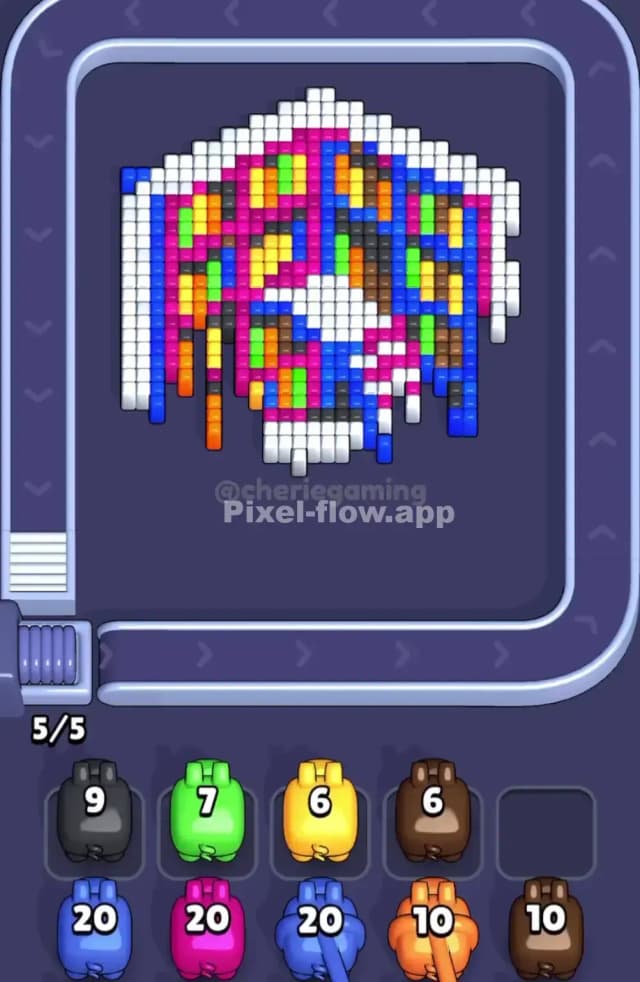
Alright, let's break down Pixel Flow Level 1875. This one looks like a chaotic mess at first glance, but it's a stylized yin-yang symbol trapped inside a hexagon. The right side is a big, clean-looking swirl of White cubes, while the left side is a rainbow explosion of Pink, Yellow, Green, Black, and Brown.
The main shield here isn't just one color; it's a combination. The large White area acts as a massive wall, protecting the inner curve of the yin-yang. The surrounding Blue and Yellow cubes form a frame that you have to break through to get to the core. The hardest colors to clear are the tiny, isolated pockets of Black, Green, and Orange that are buried deep within the multi-colored half. Getting to them is the entire point of this level.
Pixel Flow Level 1875 Overview
Visually, Pixel Flow 1875 presents a hexagonal frame. Inside, you've got a yin-yang design. But it's not a simple black and white. One half is a dense field of White cubes, curving up from the bottom right. The other half is a complete party of pixels—mostly Pink, but heavily speckled with Yellow, Green, Orange, and Brown.
The entire shape is bordered. The bottom half of the hexagon is lined with Blue cubes. The top half is lined with Yellow ones. This isn't just decoration; it's a barrier. The most dangerous part of the board is that jumbled, multi-colored section. It's designed to make you waste ammo and clog your waiting slots. This level is a trap.
Pixel Flow Level 1875 Board Logic and Color Priority
The board's logic is all about protecting the scattered, single cubes of color buried in the top-left cluster. It uses the large, monolithic block of White and the outer Blue frame as a primary shield. Your first instinct might be to blast away all that White, but don't. That's a classic mistake. You'll run out the White pig's ammo and achieve almost nothing, leaving it stuck in your waiting slots later.
Color Priority Breakdown:
-
Shield Breakers (Blue & Yellow): You have to start by chipping away at the outer frame. Hit the Blue cubes on the bottom and the Yellow cubes on top. This is non-negotiable. It's the only way to expose the more complex layers underneath.
-
The Great White Wall: Use the White pig sparingly at first. Your goal isn't to clear all the white; it's to use it to strategically expose the inner edge of the yin-yang and provide access to the Pink and Black cubes that are part of the dividing line.
-
The Rainbow Mess (Pink, Green, etc.): This is the core of the puzzle for Pixel Flow 1875. The Pink pig has a lot of ammo, but its targets are interwoven with other colors. Do not send the Pink pig until you have cleared adjacent colors to open up large, connected groups of Pink cubes. The same goes for the Green, Brown, and other minor colors. Using them too early is a guaranteed way to fail the level by clogging your slots.
The real strategy is to alternate. Clear some Blue from the frame, then a bit of White to open a path, then target a small, now-exposed group of Pink. This surgical approach prevents you from stranding a pig with leftover ammo and no targets.
Step by Step Solution Walkthrough for Pixel Flow Level 1875
Look, giving you a tap-by-tap list here is useless because the order is super precise. You have to see it in action to understand the rhythm of breaking the frame, carving the white, and then attacking the multi-colored mess.
For the exact move order and a perfect run, you should check out the Pixel Flow Level 1875 solution video linked at the top of this page. It'll make the strategy I outlined above perfectly clear.